Key Takeaways
- A clear Ideal Customer Profile (ICP) is the foundation for booking high-quality B2B meetings on LinkedIn.
- LinkedIn Sales Navigator outperforms standard LinkedIn search with advanced filters, lead recommendations, and real-time updates.
- Organizing and saving LinkedIn leads into account lists, lead lists, and syncing with your CRM keeps outreach structured and efficient.
- Pre-connection engagement — likes, comments, and profile views — warms up prospects before sending a request.
- Short, personalized LinkedIn messages with clear context and relevance drive higher acceptance rates.
- A structured post-connection messaging sequence nurtures interest, moves leads into your CRM, and turns conversations into booked meetings.
If you’ve ever tried to book quality B2B meetings, you know it’s not as easy as sending out a few connection requests and waiting for replies.
Most decision-makers are busy, inboxes are crowded, and generic outreach rarely makes it past the first message.
That’s where LinkedIn Sales Navigator changes the game.
Unlike basic LinkedIn search, it’s built for hyper-targeted lead generation, letting you find the exact decision-makers you want to connect with — filtered by role, company size, industry, and more.
At Cleverly, we’ve spent years refining a LinkedIn Sales Navigator leads workflow that consistently books meetings with the right prospects — not just anyone who accepts a connection.
In this blog, we’ll walk you step-by-step through the exact process we use to:
- Identify your ideal buyers
- Build a high-quality lead list inside Sales Navigator
- Personalize outreach that actually gets replies
- Turn conversations into booked B2B meetings
By the end, you’ll have a clear, repeatable workflow you can use to bring in better leads and higher-quality opportunities, the same one trusted by 10,000+ B2B companies we’ve worked with.
Why LinkedIn Sales Navigator is the Goldmine for B2B Leads
If you’ve ever relied on regular LinkedIn search, you’ve probably hit its limits pretty fast. You can find people, sure — but filtering is basic, search results can be inconsistent, and you spend hours sifting through profiles that don’t quite match your target.
LinkedIn Sales Navigator takes that frustration out of the equation. It’s designed for one thing. finding and managing high-quality LinkedIn Sales Navigator leads with precision.
Here’s why it’s far superior to the standard search:
- Advanced Filtering – Go beyond location and job title. With over 30+ filters, you can combine parameters like seniority level, company headcount, revenue range, and even recent LinkedIn activity. This means you’re only spending time on prospects who actually match your ideal customer profile.
- Lead Recommendations – Once you start saving leads, Sales Navigator’s AI suggests similar decision-makers you might have missed. It’s like having a smart assistant constantly adding new, relevant prospects to your list.
- Real-Time Updates – See when a saved lead changes jobs, posts content, or shares company news. These updates give you natural conversation starters and help you reach out at the perfect time.
In short, LinkedIn Sales Navigator leads aren’t just “contacts.” They’re carefully filtered, relevant, and timely, exactly the kind of people you want to fill your calendar with high-value B2B meetings.
Tools You’ll Need to Follow This Sales Navigator Lead Workflow
Before we jump into the step-by-step LinkedIn Sales Navigator leads workflow, let’s get your toolkit ready.
Here’s what you’ll need:
1. LinkedIn Sales Navigator
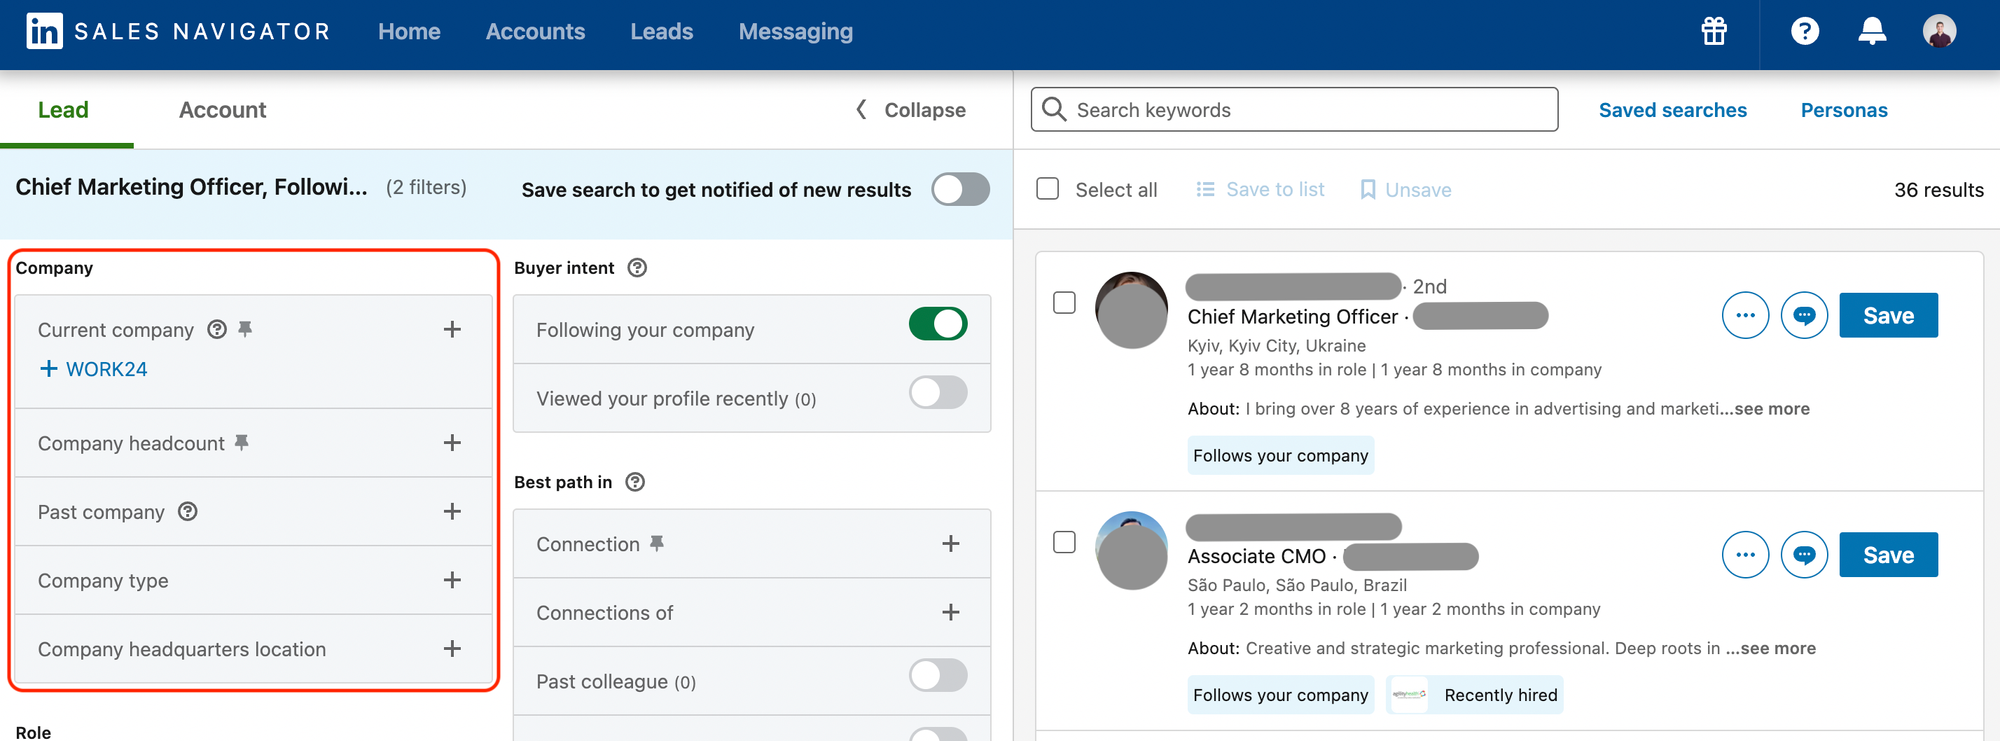
The core of this workflow. This is where you’ll run advanced searches, save leads, and get real-time updates on their activity. Without Sales Navigator, you can’t achieve the level of targeting we’re going to cover.
2. CRM (Customer Relationship Management System)
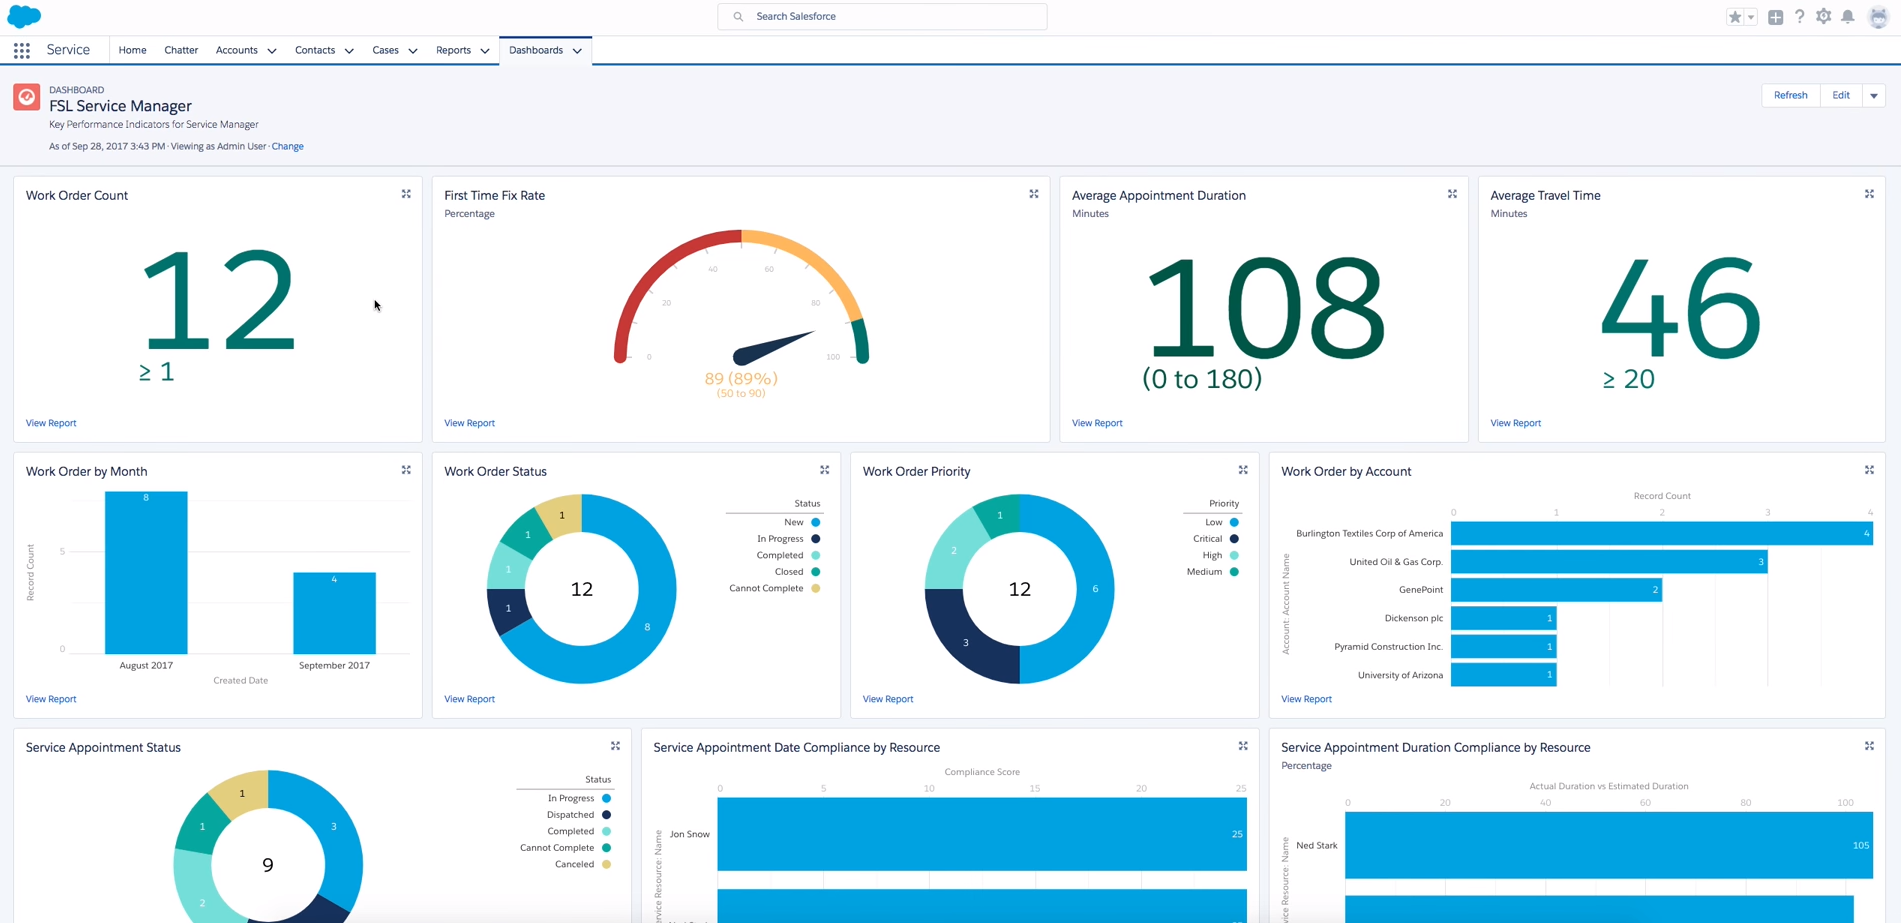
You need a centralized place to store your leads, track outreach, and manage deal stages. Popular choices include:
- HubSpot (free and paid versions)
- Pipedrive
- Salesforce
A CRM prevents you from contacting the same lead twice, helps track replies, and makes reporting easier.
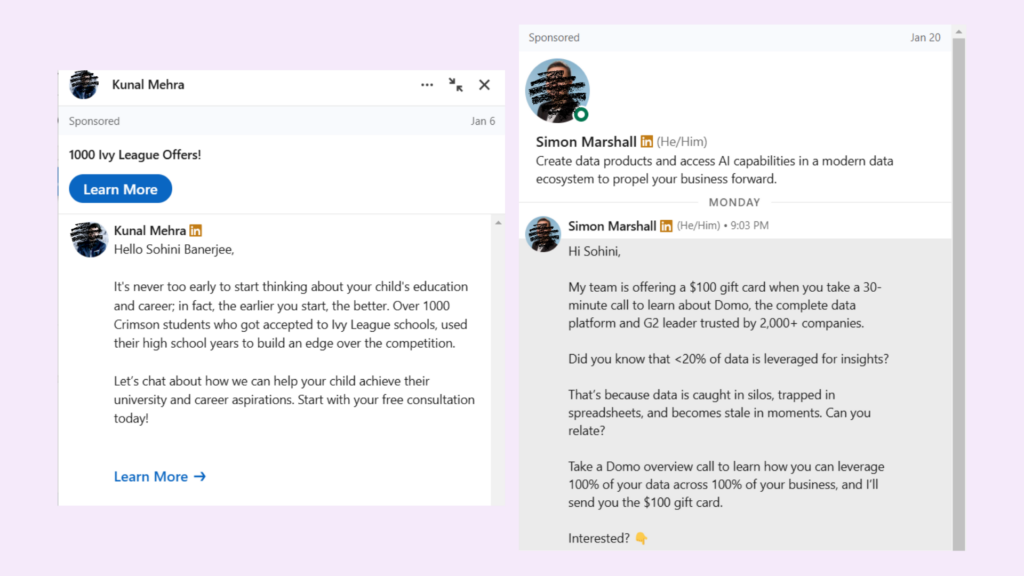
3. LinkedIn Inbox / InMail Access
You’ll be sending most of your initial outreach on LinkedIn, so you need easy access to connection requests, follow-up messages, and InMail for prospects outside your network.
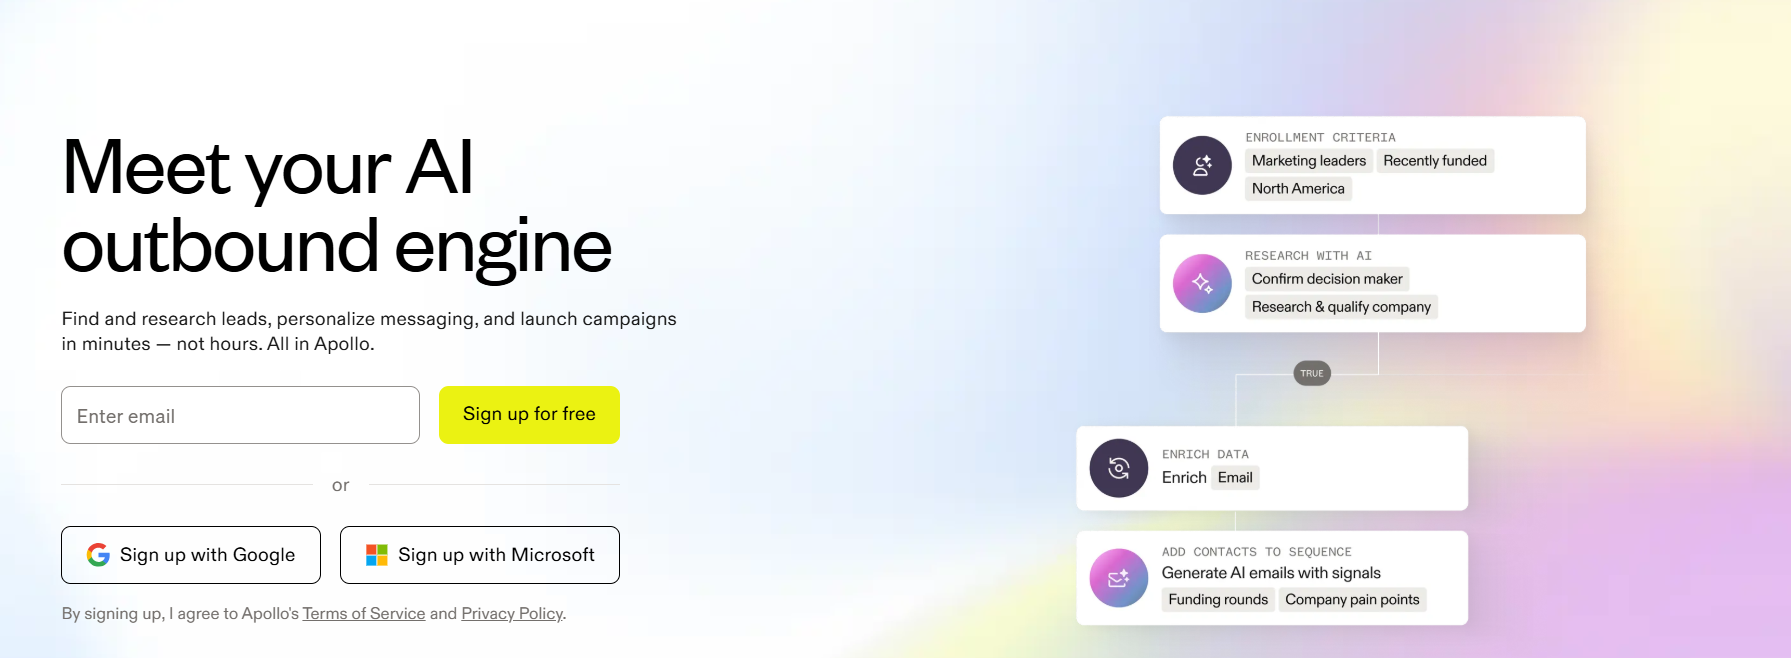
4. Email Finder Tool (Optional but Recommended)
Sometimes prospects don’t respond on LinkedIn. Having a verified work email lets you follow up via email without breaking outreach momentum. Common options:
5. Optional Integrations
To make your LinkedIn Sales Navigator leads workflow seamless:
- HubSpot Integration – Automatically sync saved leads from Sales Navigator to your CRM.
- Zapier – Connect LinkedIn activity to other apps (e.g., log new connections into Google Sheets, trigger an email task in Gmail, etc.).
Having these tools ready before you start ensures you can focus on the actual outreach rather than chasing down missing data or manually copying information.
Step-by-Step LinkedIn Sales Navigator Workflow to Book Meetings
Let’s go through the Sales navigator workflow step one by by one in detail:
Step 1 – Define Your ICP (Ideal Customer Profile)

Before you touch Sales Navigator, get crystal clear on who you actually want to talk to. If your ICP is vague, your lists will be noisy and your outreach will flop.
This first step is the backbone of every repeatable B2B linkedin targeting strategy we run at Cleverly — and it’s where most teams either win or lose.
Use linkedin sales navigator filters intentionally: think of each filter as a gate. The tighter the gate, the fewer false positives you’ll get. Below we break down the four must-define dimensions and exactly how we think about them.
Industry — restrict to relevant business verticals
- Why: Industry narrows down buyers who face the same problems you solve. Targeting the right vertical increases relevancy and reply rates.
- How we pick: start with 1–3 core industries where you have proof (case studies, clients, or experience). Then add 1–2 adjacent industries that show similar buying behavior.
- Practical tips:
- Prefer specific industry tags (e.g., “SaaS / Computer Software” or “Financial Services”) over broad ones like “Business Services.”
- Exclude unrelated verticals up front to avoid noise (e.g., “Retail” if you sell enterprise software only).
- If you’re unsure, run a quick pilot: pull 50 profiles from the industry and audit whether 60–70% match your buyer persona.
- Prefer specific industry tags (e.g., “SaaS / Computer Software” or “Financial Services”) over broad ones like “Business Services.”
Company size — headcount and revenue proxies
- Why: Buying process and budget change dramatically with company size. A VP at a 50-person startup behaves differently than a VP at a 5,000-person enterprise.
- How we pick: Use company headcount as the primary proxy; revenue if you can access it. Common buckets we use:
- 11–50 (early-stage teams, founder-heavy)
- 51–200 (growing teams, budget-friendly deals)
- 201–1,000 (mid-market buyers, more stakeholders)
- 1,000+ (enterprise, longer sales cycle)
- 11–50 (early-stage teams, founder-heavy)
- Practical tips:
- Start narrow (one or two buckets) for early campaigns.
- If your offering requires exec sponsorship, target the larger buckets and add seniority filters.
- Watch for headcount anomalies (consultancies and agencies often list high headcount but low buying authority per business unit).
- Start narrow (one or two buckets) for early campaigns.
Job titles — focus on role, not exact wording
- Why: Titles vary wildly between companies. “Head of Growth,” “VP Marketing,” and “Director of Demand Gen” could all own the same decision.
- How we pick: Build role groups rather than single-title lists. For each buyer persona, list:
- Primary titles (decision-makers) — e.g., VP Sales, Head of Sales, Chief Revenue Officer
- Secondary titles (influencers) — e.g., Sales Ops Manager, Revenue Enablement Lead
- Avoid casting the net too wide with junior titles.
- Primary titles (decision-makers) — e.g., VP Sales, Head of Sales, Chief Revenue Officer
- Practical tips:
- Use Seniority level + Function filters in Sales Navigator together (e.g., Seniority = VP+ and Function = Sales) to capture title variations.
- Create a short “title synonyms” list and test which variants yield qualified profiles—then prune the poor performers.
- Exclude ambiguous or consulting titles that create noise (e.g., “Consultant,” “Advisor”) unless they’re a deliberate target.
- Use Seniority level + Function filters in Sales Navigator together (e.g., Seniority = VP+ and Function = Sales) to capture title variations.
Region — geography and timezone matters
- Why: Region affects language, messaging, availability for meetings, and sometimes legal/regulatory fit.
- How we pick: choose regions where you can reliably deliver, handle time zones, and where you have credibility. Options include country-level, metro areas, or multi-country regions (e.g., North America, EMEA).
- Practical tips:
- If your SDRs/bookers are US-based, start with North America or similar time zones to increase live call rates.
- For international campaigns, localize message hooks (metrics, currencies, compliance references).
- Use region as a gating filter in Sales Navigator and combine with company HQ location when appropriate.
- If your SDRs/bookers are US-based, start with North America or similar time zones to increase live call rates.
Step 2 – Use Advanced Filters to Build a Laser-Focused Lead List
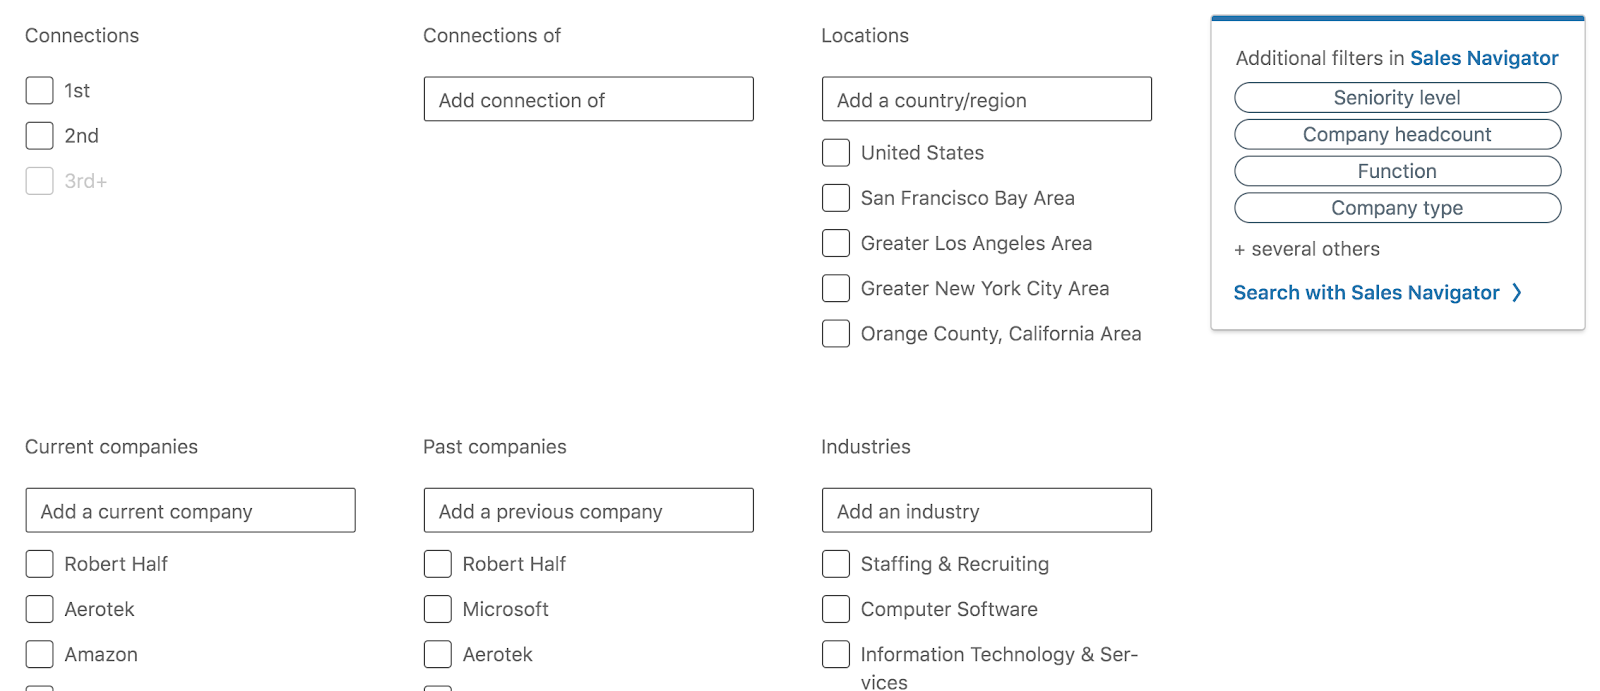
Once your ICP is set, the next step is turning that definition into an actionable list of LinkedIn Sales Navigator leads.
This is where advanced lead search features inside Sales Navigator do the heavy lifting. If Step 1 is “who you want,” Step 2 is “find them, exactly.”
1. Combine Filters for Precision
Sales Navigator has over 30+ lead filters and 15+ account filters. The magic happens when you layer them together to narrow the results without missing good prospects.
Some of our most effective combinations include:
- Seniority Level + Function + Industry
- Example: VP & C-Level + Marketing + SaaS
- Example: VP & C-Level + Marketing + SaaS
- Company Headcount + Geography + Job Title Keyword
- Example: 51–200 employees + North America + “Revenue Operations”
- Example: 51–200 employees + North America + “Revenue Operations”
- Posted on LinkedIn in Past 30 Days + Decision-Maker Titles
- Example: Active, engaged prospects who are more likely to see and respond to messages.
- Example: Active, engaged prospects who are more likely to see and respond to messages.
📌 Pro tip: Start broad with 2–3 key filters, then add more only if your list is too large or includes unqualified leads. Over-filtering too early can make you miss hidden opportunities.
2. Use Boolean Searches for Title and Keyword Variations
Job titles can be inconsistent, so Boolean logic helps you cover variations without bloating your search. Sales Navigator supports:
- OR – Include multiple variations of a keyword.
- Example: "VP Sales" OR "Head of Sales" OR "Chief Revenue Officer"
- Example: "VP Sales" OR "Head of Sales" OR "Chief Revenue Officer"
- AND – Require two terms to appear together.
- Example: "Marketing" AND "Automation"
- Example: "Marketing" AND "Automation"
- NOT – Exclude irrelevant profiles.
- Example: "Consultant" NOT "Recruiter"
- Example: "Consultant" NOT "Recruiter"
This keeps your advanced lead search flexible but relevant.
3. Save Leads and Accounts for Ongoing Tracking
When you find the right fit, don’t just download and forget. In Sales Navigator, you can:
- Save Leads – Individual people who match your ICP.
- Save Accounts – The companies you want to target (lets you see job changes, new hires, and company news).
- Get Alerts – Real-time updates when a saved lead changes jobs, posts content, or the account shares important news.
Why it matters: Saved leads/accounts turn Sales Navigator into a live database rather than a static list. You’re not starting from scratch every time, the platform continuously surfaces new LinkedIn Sales Navigator leads that match your saved parameters.
🤝 Cleverly Tip:
Before moving to Step 3, aim for a starting list of 300–500 high-fit leads. This is enough to run meaningful outreach sequences without overwhelming your team, and it gives you room to refine filters based on early reply rates.
Step 3 – Organize & Save Leads Efficiently
Finding the right prospects is only half the job. If you don’t store and organize them properly, you’ll waste hours re-running searches and risk double messaging people.
The way we manage and save LinkedIn leads at Cleverly ensures nothing slips through the cracks and every lead is easy to find when it’s time to reach out.
1. Use Account Lists for Company-Level Targeting
If you sell into specific organizations or verticals, start by saving accounts (companies) that fit your ICP.
- Why: This gives you a high-level view of the entire company, including new decision-makers that pop up over time.
- How we use it:
- Create lists by industry (e.g., Top SaaS Accounts – North America).
- Track company news, funding rounds, and hiring sprees — these are perfect triggers for outreach.
- Drill into the account to see all decision-makers, influencers, and recent hires.
- Create lists by industry (e.g., Top SaaS Accounts – North America).
2. Create Lead Lists for Outreach Sequencing
When you find an individual contact that matches your ICP, save them to a Lead List.
- Why: Lead Lists let you organize prospects into outreach-ready batches without mixing them with unrelated contacts.
- How we use it:
- Break lists down by campaign (e.g., US – VP Marketing – SaaS).
- Keep each list size manageable — ideally 300–500 leads per campaign so you can run focused outreach.
- Use Lead List filters to sort by activity (e.g., posted in last 30 days) before sending messages.
- Break lists down by campaign (e.g., US – VP Marketing – SaaS).
3. Keep Lead Tracking on Sales Navigator Synced With Your CRM
Manually copying data is a fast way to make mistakes. Instead, sync your lists or export leads into your CRM so all outreach is tracked in one place.
- CRM Sync Options:
- HubSpot: Native integration lets you send saved leads/accounts directly to your CRM.
- Salesforce: Map fields so contact info stays clean and consistent.
- Pipedrive / Zoho: Use Zapier or a connector tool to push leads in automatically.
- HubSpot: Native integration lets you send saved leads/accounts directly to your CRM.
- Exporting Leads:
- If your CRM doesn’t integrate directly, export a CSV of lead details from Sales Navigator (through a tool like Apollo or Skrapp) and upload into your CRM.
- Always include profile URLs in your export so you can quickly return to their LinkedIn profile later.
- If your CRM doesn’t integrate directly, export a CSV of lead details from Sales Navigator (through a tool like Apollo or Skrapp) and upload into your CRM.
🤝 Cleverly Tip:
Name your lists with a clear, consistent format — [Region] – [Title] – [Industry]. This makes it easy to filter and report on campaign performance later. A well-organized save LinkedIn leads system also helps you recycle prospects into future campaigns without repeating work.
Step 4 – Engage with Your Leads Before Connecting
One of the easiest ways to increase acceptance rates and reply rates is to start the conversation before you send a connection request.
At Cleverly, we’ve found that light, intentional LinkedIn lead engagement can warm up even cold prospects — so when your request lands, you’re already on their radar.
1. Interact with Their Content
If your lead is active on LinkedIn, they’re likely posting, commenting, or sharing updates. Spend a few minutes engaging with that content:
- Like their recent posts to show interest.
- Share posts that align with your audience, adding your own brief perspective.
- Engage with shared company updates to position yourself in their professional circle.
This kind of warming up leads creates small, positive touchpoints that make your outreach feel less like a cold pitch and more like a continuation of a conversation.
2. Leave Thoughtful, Relevant Comments
A comment is more visible than a like and can help you stand out. The key is to add value — don’t just say “Great post.”
- Pull out one key idea from their post and expand on it.
- Ask a relevant follow-up question that invites dialogue.
- Relate their point to an insight or trend you’ve seen in your own work.
Example:

3. View Their Profile to Trigger Awareness
LinkedIn shows users who’s viewed their profile. Simply visiting your lead’s profile a day or two before sending a connection request can make your name more familiar.
This is subtle but works especially well when paired with content engagement.
4. Sequence for Pre-Outreach Warm-Up
Here’s how we typically sequence LinkedIn lead engagement before sending a connection:
- Day 1: Like or comment on a recent post.
- Day 2–3: View their profile.
- Day 4: Send a personalized connection request (covered in the next step).
This staggered approach increases the odds your name will be recognized, making your connection feel warmer and your message more likely to get read.
🤝 Cleverly Tip: Track engagement in your CRM or Sales Navigator notes so you know who’s been “warmed” and who hasn’t. Leads that have interacted with your profile or posts before you reach out consistently respond at higher rates.
Step 5 – Personalized Connection Requests
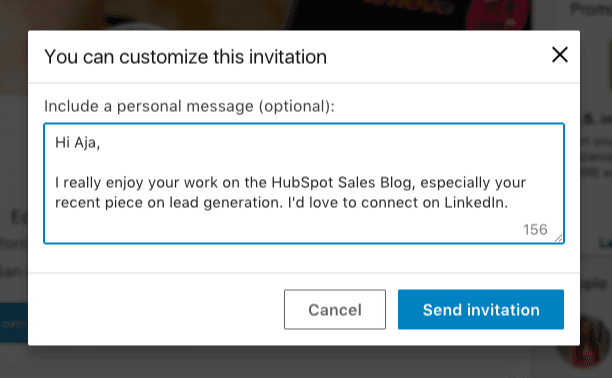
Once you’ve warmed up your lead, it’s time to reach out. A well-crafted connection request can be the difference between an accepted invite and getting ignored.
At Cleverly, we’ve tested thousands of personalized LinkedIn messages and know that short, relevant, and human wins every time.
1. Keep It Short and Relevant
Your prospect decides in seconds whether to accept, so skip the fluff. A good connection message is:
- Under 300 characters
- Relevant to them (role, company, content they posted, or shared connections)
- Zero sales pitch — your goal here is to connect, not sell
2. Personalization Framework
To make personalization efficient, we use this three-part formula:
- Context – Why you’re reaching out (shared interest, mutual connection, content they posted).
- Relevance – Link your outreach to their role, company, or industry challenge.
- Soft CTA – Invite them to connect without pressure.
3. Connection Message Tips
- Avoid generic “I’d like to add you to my network.” It shows no effort.
- Reference something specific they’ve done — a recent post, company milestone, or shared event.
- End with a friendly, open-ended question or statement that encourages acceptance.
4. First-Touch Message Templates
⭐ Template 1 – Content-Based Connection
“Hi [First Name], I saw your recent post on [topic] and found your take on [specific point] really interesting. Would love to connect and follow more of your insights.”
⭐ Template 2 – Shared Network/Interest
“Hi [First Name], I noticed we’re both connected to [mutual contact] and work in [shared industry]. Always happy to connect with fellow [role/industry] professionals.”
⭐ Template 3 – Industry Relevance
“Hi [First Name], I work with [type of companies] in [industry] and saw your role at [company]. Thought it’d be great to connect and share perspectives.”
🤝 Cleverly Tip: Track acceptance rates per template in your CRM. Over time, you’ll see which connection message tips resonate with specific industries, roles, or regions. We’ve seen a 20–35% lift in acceptance rates simply by tweaking the first line for each campaign.
Step 6 – Post-Connection Messaging Sequence
Once your connection request is accepted, the real work begins. Too many people rush into a pitch immediately, but with high-value LinkedIn Sales Navigator leads nurturing, your goal is to build enough trust and interest to make a meeting the obvious next step.
Here’s the three-message follow-up sequence we use at Cleverly for consistent, high-quality B2B meeting bookings:
Message 1 – Thanks + Value Intro (Sent within 24–48 hours of connection)
Purpose: Acknowledge the connection, briefly introduce yourself, and set a helpful, non-sales tone.
Example:
“Thanks for connecting, [First Name]! I work with [type of companies] in [industry] to [brief value statement without selling]. I’ve been enjoying your posts on [topic] — curious, what’s your focus for [specific quarter/year]?”
Why it works:
- Builds rapport without asking for anything.
- Opens space for them to share priorities, giving you conversational leverage for future messages.
Message 2 – Soft CTA with a Case Study or Resource (Sent 3–5 days after Message 1)
Purpose: Provide value and subtly show credibility through relevant proof.
Example:
“By the way, we recently helped [similar company or industry peer] [specific result, e.g., ‘book 22 sales meetings in 60 days’] using a LinkedIn outreach approach. Here’s a quick breakdown if you’re interested: [link to short case study or resource].”
Why it works:
- Establishes authority without heavy pitching.
- Puts results in context your lead can relate to.
- Gives them something actionable to review.
Message 3 – Direct Meeting Booking CTA (Sent 4–6 days after Message 2)
Purpose: Transition from conversation to a booked meeting, with a clear and easy next step.
Example:
“Thought I’d see if this could make sense for [Company Name]. If it’s worth exploring, happy to share the full workflow we used for [similar client’s result]. Does a quick 15-min chat next week work for you?”
Why it works:
- Clear value proposition tied to results they care about.
- Simple yes/no question removes decision friction.
- Positions the meeting as a knowledge share, not a hard sell.
🤝 Cleverly Tip: Space your messages out and keep tone casual. If there’s no reply after Message 3, we often re-engage 30–45 days later with a fresh hook — like a new case study or relevant industry update. Nurturing LinkedIn Sales Navigator leads over time keeps you top-of-mind when they’re ready to buy.
Step 7 – Move Hot Leads to Your CRM or Outreach Flow
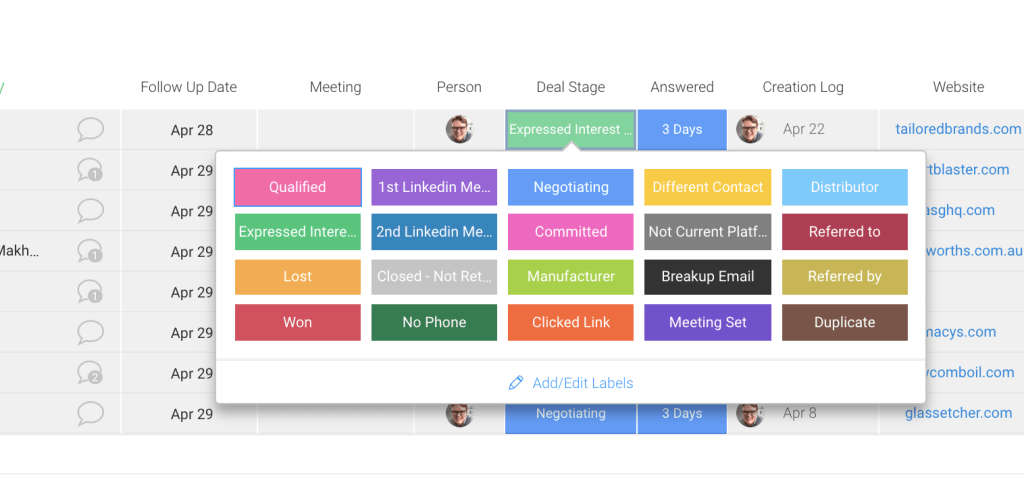
Once a prospect shows interest — whether they reply positively, ask for more details, or agree to a meeting — they’re no longer just a name in Sales Navigator.
They’re now a “hot” lead, and your priority is to get them into your sales process without losing momentum. This is where LinkedIn leads to CRM integration becomes critical.
1. Track Responses in Real Time
You should be monitoring LinkedIn messages daily so no reply sits for more than 24 hours. At Cleverly, we:
- Tag leads in Sales Navigator or LinkedIn messages based on reply type (Interested, Not Now, Not a Fit).
- Add internal notes with context — what they responded to, any pain points mentioned, and potential objections.
- Immediately update the CRM to keep sales, SDR, and marketing teams aligned.
2. Shift Channels When It Makes Sense
While LinkedIn is great for initial conversations, some prospects prefer other communication channels for scheduling or deeper discussions.
- Move to Email: If they ask for more details or request documents, send them over email so you can attach files and CC relevant teammates.
- Move to Phone or Video Call: If they’re warm and ready to discuss, send a scheduling link (Calendly, HubSpot Meetings, Chili Piper) to lock in a time.
- Rule of Thumb: We typically move hot leads to email or calls within 1–2 exchanges after clear interest is shown. This keeps the deal moving while they’re engaged.
3. Booking the Meeting
- Use a scheduling link with your real-time availability to avoid back-and-forth.
- Include a short description of what the meeting will cover to set expectations (e.g., “Walk through how we helped [similar company] book 20+ B2B meetings in 60 days”).
- Confirm attendance the day before — either through LinkedIn, email, or a calendar reminder.
4. Integrating with Your Outreach Flow
With outreach integration, your CRM becomes the single source of truth for every lead, whether they came from LinkedIn, email, or another channel.
- HubSpot / Salesforce: Sync LinkedIn data directly so new leads are auto-enrolled into nurture workflows if they don’t convert immediately.
- Zapier Automations: Automatically push new LinkedIn leads or tag updates into your CRM, email sequences, or Slack alerts for your sales team.
- Outreach Tools (Outreach.io, Apollo, Lemlist): For leads that didn’t book yet but showed some engagement, drop them into a multichannel nurture campaign combining LinkedIn touches, email, and calls.
🤝 Cleverly Tip: Always close the loop. Every LinkedIn lead to CRM transfer should include notes, lead source tags, and the exact messaging they responded to. This gives your sales team context to personalize follow-ups and improves targeting for future campaigns.
Results We’ve Achieved Using This Workflow
We’ve run this exact workflow for years, across thousands of campaigns, and the numbers speak for themselves. At Cleverly, we don’t just talk about high-quality B2B meetings, we deliver them.
Using our precise targeting, structured engagement, and proven messaging sequences, we’ve helped 10,000+ clients connect with decision-makers at some of the most recognized companies in the world, including:
- Amazon
- Google
- Uber
- PayPal
- Slack
- Spotify
The impact? Our LinkedIn outreach results have generated:
- $312 Million in pipeline revenue
- $51.2 Million in closed revenue directly through LinkedIn outreach
- Thousands of booked meetings with qualified prospects across industries
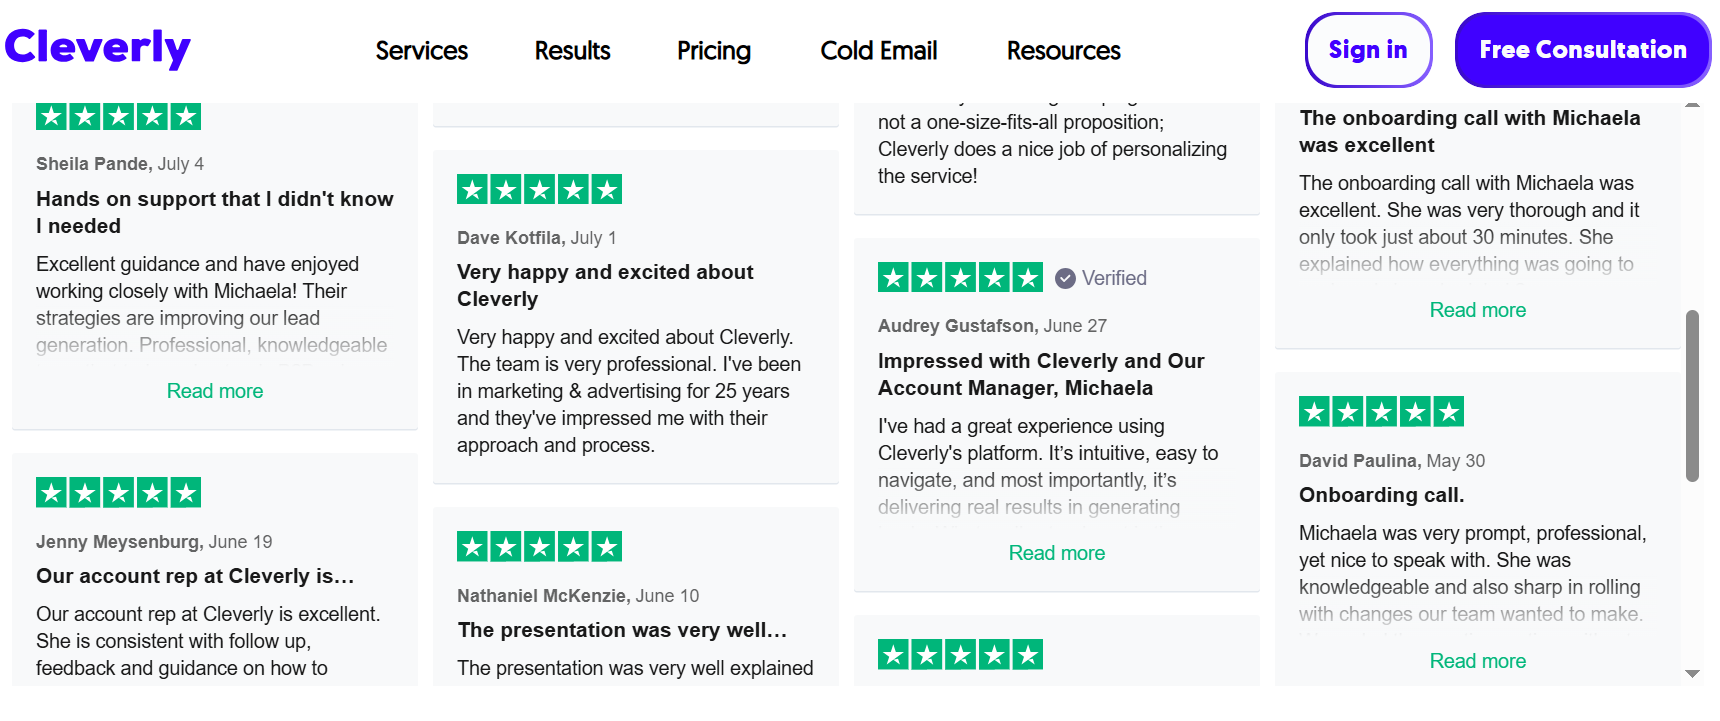
If you want the same results, more booked meetings with the exact buyers you care about, our team can run this workflow for you from start to finish. You get the meetings, we handle the heavy lifting.
→ Let’s turn your LinkedIn profile into a predictable meeting-booking machine.
Frequently Asked Questions
1. How do I generate leads using LinkedIn Sales Navigator?
You can generate LinkedIn Sales Navigator leads by defining your ICP, using advanced filters to find prospects, engaging with them before connecting, and following a structured messaging sequence.
2. What are the best filters to use in LinkedIn Sales Navigator for B2B lead generation?
For B2B LinkedIn lead generation, the most effective filters include industry, company size, job title, seniority level, and location — combined with keywords and Boolean searches.
3. How many leads can I save in LinkedIn Sales Navigator?
You can save up to 10,000 leads and 5,000 accounts in Sales Navigator, making it easy to organize and track prospects.
4. What is the difference between leads and accounts in Sales Navigator?
Leads are individual LinkedIn profiles, while accounts represent companies. You save both to track engagement and target decision-makers within key organizations.
5. How can I export leads from LinkedIn Sales Navigator?
Sales Navigator doesn’t have a direct export option, but you can sync LinkedIn leads to your CRM (like HubSpot or Salesforce) or use third-party integrations like Zapier.
6. Is it possible to automate outreach with LinkedIn Sales Navigator?
Yes, but you’ll need an external LinkedIn outreach tool. Use automation carefully to avoid violating LinkedIn’s connection and messaging limits.
7. How long should I wait before sending a follow-up message on LinkedIn?
A good rule is to wait 2–4 days after your first message before following up, allowing your lead time to see and respond.
8. Can I track my lead engagement within Sales Navigator?
Yes, Sales Navigator shows lead engagement data like post activity, profile views, and message history so you can time your outreach better.
9. What’s the ideal messaging sequence after connecting with a lead?
An effective sequence is:
- Thank you + Value intro
- Soft CTA with a helpful resource or case study
- Direct meeting booking CTA
10. How effective is LinkedIn Sales Navigator for booking high-quality B2B meetings?
When used strategically, Sales Navigator is one of the most effective tools for high-quality B2B meetings, delivering targeted leads and higher conversion rates than generic outreach.


